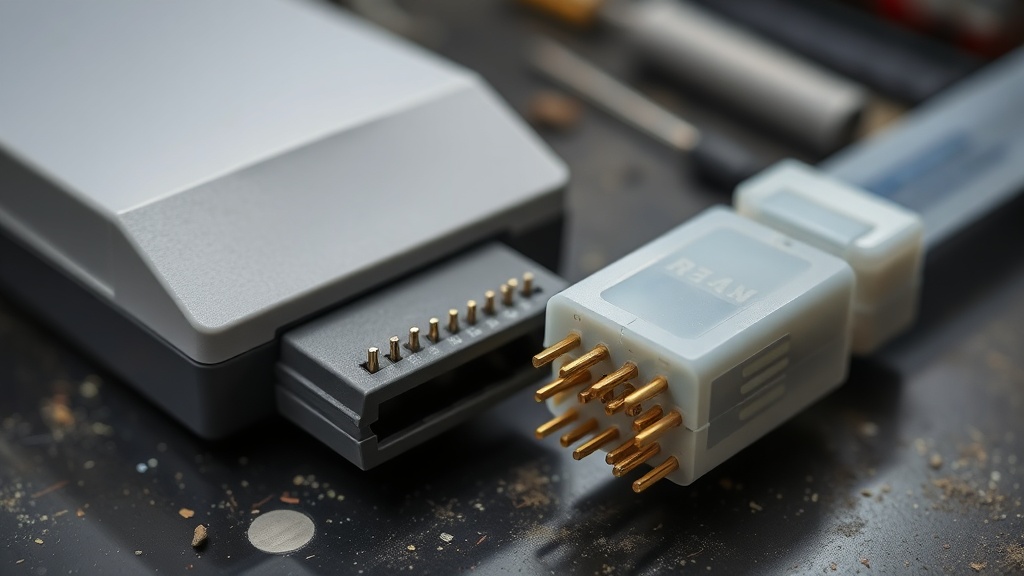
The 72-Pin Connector: Why Every NES Cleaning Guide You've Read Is Probably Wrong

Let's look under the hood at the most misunderstood component in retro collecting: the NES 72-pin connector. Not the cartridge. Not the board. The connector—that thin-fingered beast sitting inside every front-loader Nintendo Entertainment System, quietly determining whether your Castlevania III boots or flashes gray at you for the next twenty minutes.
I've watched collectors blow into cartridges, boil connectors in pots of tap water, scour the contacts with pencil erasers, and dunk the whole assembly in cheap rubbing alcohol. I've watched them do this with $300 artifacts in their hands. And every time, I think the same thing: you learned that from the internet in 2003, and the internet in 2003 did not understand metallurgy.
What the 72-Pin Connector Actually Is
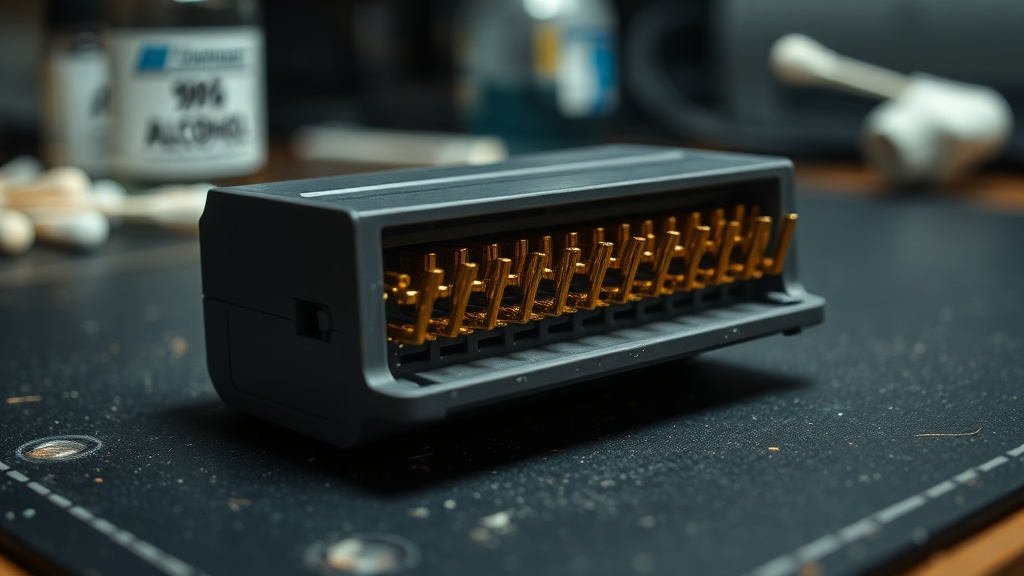
The connector is phosphor bronze—a copper-tin-phosphorus alloy chosen specifically for its spring temper and electrical conductivity. Each of the 72 fingers is formed and then electroplated: nickel undercoat, then gold on top. The gold layer is thin. Factory-original connectors typically carry somewhere in the range of 15 to 30 microinches of gold plating—enough to prevent oxidation and ensure consistent contact resistance, but not enough to survive casual abuse.
That's microinches, not microns. It's a distinction worth making: 30 microinches is roughly 0.76 micrometers. You're not polishing a coin. You're working with a contact surface thin enough that a few aggressive cleaning passes represent a meaningful percentage of its total depth.
This is not a "clean it and it works" component. This is a precision contact surface that degrades in very specific ways, and the degradation mechanisms matter enormously for understanding what you should—and definitely should not—do to it.
The Oxidation Myth (And What's Actually Happening)
Every forum post about NES cleaning says the same thing: oxidation. Clean off the oxidation.
Wrong. Or rather—incomplete to the point of being harmful.
Yes, gold oxides minimally (that's why it's used). What you're actually dealing with when a 72-pin connector fails is a combination of three things:
Contact fretting. Every time you insert a cartridge, the pins flex microscopically. Over thousands of cycles, that flexion causes micro-wear. Not oxidation—mechanical abrasion. The gold plating thins at the contact zones, exposing the nickel undercoat, which does oxidize aggressively. What you're seeing as "corrosion" is often nickel oxide, not gold oxide.
Contamination accumulation. Dust, humidity, skin oils, flux residue from factory soldering—all of it migrates into the connector over 35–40 years. This sits between pin and cartridge contact pad, increasing resistance. Isopropyl alcohol removes this. Erasers and abrasives do not target this—they remove plating.
Spring fatigue. The phosphor bronze fingers have a natural tension that holds them against cartridge contacts. Four decades of repeated insertion, plus the notorious "NES lock-out chip forcing you to press down and click cartridges in at an angle" design—that spring tension degrades. Pins that no longer make positive contact are not dirty. They're worn. No amount of cleaning fixes spring fatigue.
The Boiling Method: Why It Works and Why I'm Skeptical of It Long-Term
I'll be direct: boiling works. It measurably works—in the short term. The hot water causes the phosphor bronze to expand and partially recover some of its original geometry, pushing the pin fingers back toward factory position. Contamination is also flushed out.
My concerns:
The tap water you're using contains minerals. Those minerals deposit on the connector surfaces as the water evaporates. You can't fully eliminate this without distilled water and a final rinse cycle, which almost no one does.
The longer-term metallurgy question is less settled. Thermal cycling is generally understood to affect spring metals over time, and phosphor bronze is no exception—but I won't overstate the mechanism or the timeline. What I will say is that boiling a connector is a coarser intervention than most guides acknowledge, and I've seen enough treated connectors fail faster than uncleaned originals to make me cautious about recommending it for anything you plan to hold long-term.
If you're boiling a connector you plan to keep in a working system, just know it may not be a neutral act. The first boil often refreshes. Beyond that, the returns are uncertain—and potentially negative.
What Actually Works
Here's the protocol I use. It's boring. It's not a trick. It works. (If you're looking for a more comprehensive hardware care workflow, I've written a full cartridge cleaning protocol that covers the broader implications of improper surface treatment.)
90%+ isopropyl alcohol, cotton swabs, patience.
Not 70% isopropyl. Not rubbing alcohol. The water content in lower-concentration formulations leaves mineral deposits and takes longer to evaporate fully. 90% minimum. 99% if you can source it. Everclear in a pinch—genuinely.
Soak a cotton swab, work it along the connector pins lengthwise (with the contact surface, not across it). You're not scrubbing. You're dissolving and lifting contamination. Multiple passes. Change swabs when they go gray.
No erasers. Ever. This is the one that makes me walk away from forum threads. A vinyl eraser is an abrasive. It removes the gold plating. It leaves vinyl particulate in the connector. It feels like it's "cleaning" because you're physically removing material—but the material you're removing is the material keeping the connector functional for another decade.
For pin re-tensioning without boiling: a plastic spudger, carefully inserted between each pin finger and the connector housing, gently lifting the pin to restore its angle. This takes 20 minutes. It's tedious. It works without the thermal intervention.
The Replacement Question
New 72-pin connectors are available from multiple vendors. They cost somewhere in the $6 to $15 range as of this writing—that'll move. They're pressed from modern phosphor bronze, generally to the same spec as OEM.
Here's my position on swapping them: replacement connectors are appropriate for working systems you use actively. They are not appropriate for artifacts you're preserving or preparing for resale. This same logic applies across all hardware replacements—I've covered the broader decision matrix in my cartridge save battery replacement playbook.
Why? Because a third-party connector changes the asset. A collector verifying an NES they're buying should be checking that connector—its oxidation pattern, its wear profile, the specific color of the contact zones—as part of authentication. An OEM connector with 40 years of honest wear tells a story. A shiny new aftermarket unit tells me someone was trying to refresh something.
And there's the authentication angle: a suspiciously pristine connector on an otherwise-aged system is a yellow flag. It doesn't mean fraud. It means ask questions. Understanding how to verify authenticity through wear patterns is essential when buying at auctions or from resellers.
The Market Read
Here's what this means practically, because everything I say eventually comes back to the asset value—and these are my read on current conditions, not permanent rules:
An NES in working condition with an original, properly cleaned connector commands a premium with serious collectors over an NES with a swapped connector—even if the swap makes it functionally equivalent. Provenance matters. Originality matters. A connector replacement should be disclosed, the same way any component replacement should be disclosed.
I've seen systems sold at swap meets with "just cleaned and fully working" in the listing, no mention of a connector swap. That's not fraud by most definitions. But it's not the full picture, and a collector who knows what they're looking at will knock the price accordingly.
The board doesn't lie. The connector doesn't either—if you know what questions to ask it.
The Quick Field Checklist
When you're looking at an NES at a show or swap meet, here's what to check before you hand over cash. (Before you even get there, I've documented what to watch for at swap meets and cons to avoid common schemes entirely.)
- Pin color at contact zones: Should be consistent, slightly worn gold. Uniform brightness across all pins is a red flag for either a new swap or chemical treatment.
- Pin geometry: Individual pins should have slight variation—some more fatigued than others based on insertion patterns. Perfect uniformity means either very low use or a replacement.
- Housing contamination: Original connectors accumulate a characteristic lint/dust profile inside the housing. Clean-as-new housing on an otherwise-aged unit means someone was in there.
- Pin spacing at edges: Pins at the outer edges of the connector wear differently than center pins. Consistent wear across all 72 is the tell for a boiled connector.
None of these are definitive alone. All of them together build a picture.
The 72-pin connector is the NES's weak point by design—the lock-out chip's insertion-force requirement meant those pins took decades of stress that the hardware was never quite built to sustain. Nintendo knew it. The third-party clone market for replacement connectors existed before the NES was even discontinued.
That doesn't mean you should be careless with it. These artifacts are 35 to 40 years old. The connectors that survive with their original plating intact are getting rarer every time someone follows bad advice from a 2003 forum post.
90% IPA. Cotton swabs. A plastic spudger if you're patient. Distilled water if you absolutely insist on heat.
Happy hunting, but watch the connector.