7 Telltale Signs You're Holding a Reproduction Cartridge

The $1.2 Billion Problem Hiding in Plain Sight
The retro gaming market hit $1.2 billion in 2023—and counterfeiters noticed. Walk into any flea market, browse eBay listings at 2 AM, or scroll through Facebook Marketplace, and you'll find reproduction cartridges masquerading as authentic classics. Some sellers are transparent (and that's fine—repros have their place for budget-conscious players). Others? Not so much. They're banking on your excitement clouding your judgment, hoping you won't notice that $300 "EarthBound" is actually a $12 PCB in a shiny plastic shell.
Here's the thing—reproduction cartridges aren't inherently evil. When labeled honestly, they let gamers experience titles they'd never afford otherwise. The problem starts when they're passed off as originals, diluting collections and draining wallets. I've authenticated over four thousand cartridges in the past decade, and I can spot most fakes in under ten seconds without opening the case. Not because I'm some kind of savant, but because I know what factory-original manufacturing looks like—and more importantly, what it doesn't look like.
This isn't about snobbery or gatekeeping. It's about protecting your investment and understanding what you're actually buying. Whether you're dropping $50 on a uncommon NES title or $2,000 on a sealed Chrono Trigger, these seven signs will help you identify reproductions before money changes hands. No special tools required—just your eyes, your hands, and knowing what questions to ask.
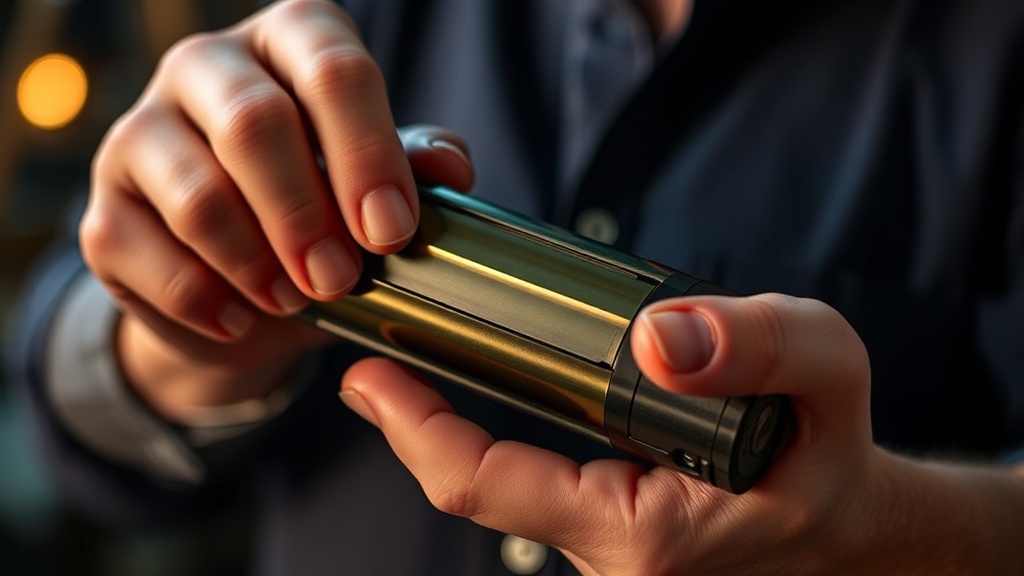
Why Does the Cartridge Feel Lighter Than It Should?
Authentic cartridges have a specific heft that comes from quality ABS plastic, proper shielding, and genuine PCBs with the correct component density. Nintendo, Sega, and other manufacturers weren't cutting corners—they built these things to survive rental stores, dorm rooms, and twenty years in a shoebox.
Pick up a suspected reproduction and compare it against a verified authentic cartridge from the same system. Most repros feel noticeably lighter. The plastic is thinner, often injection-molded with less material to cut costs. The PCB inside might be a bare-bones design with fewer components, missing the RF shielding found in originals. Some repro manufacturers use multi-game boards that are lighter than single-game authentic PCBs.
This weight difference isn't dramatic—you're talking maybe 10-15 grams—but it's consistent. I keep a small postal scale on my authentication desk for exactly this reason. An authentic Super Nintendo cartridge typically weighs between 52-58 grams depending on the ROM chip configuration. Most repros clock in at 42-48 grams. That gap is your first warning sign, especially on higher-value titles where every detail matters.
Can You Spot the Label Quality Differences?
Original cartridge labels were printed using specific processes—thermal transfer, screen printing, or offset lithography depending on the era and manufacturer. The colors are precise. The text is crisp. And critically, the adhesive was applied in controlled factory conditions.
Reproduction labels tell a different story. The colors are often oversaturated—designers trying to make their product "pop" end up creating labels that are too bright, too contrasty, or just slightly "off" compared to documented originals. Text might be blurry when examined under magnification. And the adhesive? It's usually too aggressive (labels that feel stiff) or too weak (corners peeling within weeks).
Run your finger across the label surface. Authentic labels from the 8-bit and 16-bit era have a specific texture—slightly matte, never glossy. Modern repros often use glossy photo paper or vinyl that catches light differently. Look at the edges where the label meets the plastic. Factory labels have clean, consistent borders. Repro labels might show cutting irregularities, adhesive seepage, or that telltale white border from poorly trimmed paper stock.
For high-value authentication, compare against PriceCharting's extensive label photography or consult the NintendoAge community archives—both maintain reference databases that document the subtle variations between regional prints and manufacturing runs.
What's Wrong With These Screws?
Nintendo used specific screw types across different hardware generations. NES cartridges featured 3.8mm security bit screws (often called "gamebit" screws). Early Super Nintendo titles used the same. Later SNES games, Nintendo 64 cartridges, and Game Boy titles switched to tri-wing screws. These weren't arbitrary choices—they were standardization efforts that also happened to keep curious kids from opening cartridges and voiding warranties.
Reproduction cartridges often use standard Phillips head screws. Why? Because 3.8mm bits and tri-wing drivers aren't sitting in everyone's kitchen drawer. Repro manufacturers targeting casual buyers know most people won't own the proper tools, so they use what everyone has. If you open a "rare" NES game and find a Phillips head screw where a security bit should be, you've got questions that need answering.
Even when repros use the correct screw type, the quality differs. Authentic screws have consistent threading, proper depth, and standardized heads that sit flush with the plastic. Cheap repro screws strip easily, sit unevenly, or show machining marks from poor manufacturing. The metal itself might be different—authentic screws respond to magnets predictably based on their nickel or zinc coating. Cheap repro screws sometimes use inferior alloys that behave differently.
Does the PCB Edge Connector Look Suspicious?
The edge connector—that copper strip that slides into your console—is where the magic happens. Authentic connectors were manufactured to precise specifications, with specific plating thicknesses, beveled edges, and contact pad dimensions that ensured reliable connections through thousands of insertion cycles.
Reproduction PCBs often cut corners here. The plating might be thinner (or missing entirely on budget repros), leading to corrosion issues within months instead of decades. The bevel angle—the slight taper that helps the cartridge slide smoothly into the slot—might be wrong. Too steep and the cartridge won't seat properly. Too shallow and you'll feel resistance inserting and removing it.
Look at the copper color. Authentic cartridges use specific plating materials—gold or nickel depending on the manufacturer and era—that age in predictable ways. Fresh, bright copper on a supposedly 30-year-old cartridge is a dead giveaway. So are solder joints that look machine-perfect (they're probably reflowed modern work) instead of the slightly irregular hand-soldered joints found on many authentic PCBs from certain manufacturing periods.
The via placement—the tiny holes connecting PCB layers—follows specific patterns in authentic cartridges. Repro PCBs sometimes get these wrong, placing vias in locations that don't match documented factory layouts. If you can find a PCB scan on Console5's technical wiki, compare the via patterns. They should match exactly.
Why Is the Shell Plastic Wrong?
ABS plastic formulations vary by manufacturer, era, and intended application. Nintendo's suppliers used specific compounds that aged in characteristic ways—the famous "SNES yellowing" being the most visible example of how these plastics interact with light and oxygen over decades.
Reproduction shells use modern ABS that looks and feels different. The texture is often smoother—authentic cartridges have a subtle grain from the molding process that's hard to replicate. The color might be slightly off, especially on titles where the original plastic had specific tinting. EarthBound repros are notorious for having shells that are too gray or too brown compared to the distinctive warm tone of authentic copies.
Look at the mold marks—small impressions or numbers indicating which production mold created the shell. Authentic cartridges have specific markings in consistent locations. Repro molds might be missing these entirely, or they might have markings that don't match known factory codes. The injection points where plastic entered the mold are another tell. Authentic shells have clean, precise injection points. Cheap repros sometimes show rough patches, flow lines, or sink marks where the plastic cooled unevenly.
The cartridge ridges—the grip lines on the back or sides—are surprisingly diagnostic. Nintendo's molds created sharp, consistent ridges. Repro molds often produce softer edges, irregular spacing, or ridges that feel "rounded" instead of defined. It's the kind of detail you don't notice until you've handled hundreds of authentic cartridges, but once you see it, you can't unsee it.
What About That EPROM Window?
Some authentic cartridges—particularly early production runs, development cartridges, and certain regional variants—feature EPROMs with visible quartz windows. These windows allowed manufacturers to erase and reprogram chips using UV light. They're legitimate, but they're also rare on consumer retail cartridges.
Reproduction manufacturers love EPROMs with windows because they're cheap and readily available. The problem? They're putting them in cartridges where they don't belong. If your "authentic" copy of a common late-era SNES game has a windowed EPROM, you're almost certainly looking at a repro. Same for NES titles that should have mask ROMs but feature EPROM windows covered with stickers (often Nintendo-branded stickers, which adds insult to injury).
Even when the window is covered with a paper or foil label, you can sometimes see the telltale square outline. Authentic cartridges that legitimately used EPROMs had specific labeling protocols—the stickers were applied in specific orientations, with specific adhesives that aged predictably. Random stickers covering EPROM windows on supposedly factory-sealed cartridges? That's your cue to walk away.
When Should You Demand Board Photos?
For any transaction over $100, you should insist on clear photos of the PCB—both sides. Sellers with authentic merchandise rarely refuse this request. Sellers with something to hide will give you excuses about not having the right screwdriver, being "too busy," or claiming opening the cartridge "voids the collectible value" (it doesn't).
Learn to read what you're seeing. Authentic Nintendo PCBs have specific silkscreen markings, component placements, and chip labels that are extensively documented in collector communities. The Nintendo logo appears in specific locations on official boards. The chip labels follow patterns indicating manufacturer, date, and ROM size. Counterfeiters sometimes get close, but they rarely get everything right.
Check the electrolytic capacitors—the small cylindrical components. Authentic cartridges used specific brands (Nichicon, Rubycon, Panasonic) with date codes matching the manufacturing period. Repros often use modern capacitors that are physically smaller, different colors, or from brands that didn't exist when the game was supposedly produced. A "1988" NES game with a capacitor dated 2022 is performing some impressive time travel.
Ultimately, authentication is about pattern recognition and knowing what questions to ask. The cartridge doesn't lie—even when the seller does. Trust your hands, trust your eyes, and when something feels off, walk away. There will always be another copy. Your wallet and your collection will thank you.